Fox-One Communications - Treehouse
Welcome to the Treehouse page. The treehouse is my own custom design that goes between two trees. The dimensions are 10 feet by 14 feet with a 10x9 house and a 10x5 deck. One of the trees penetrates the deck so the main house fits completely between the 2 trees.
Jump to LATEST UPDATE
The start was in late September 1998.
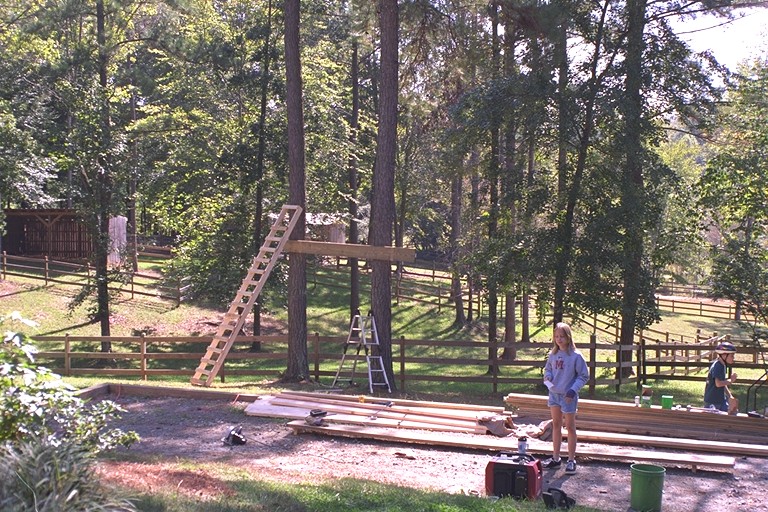
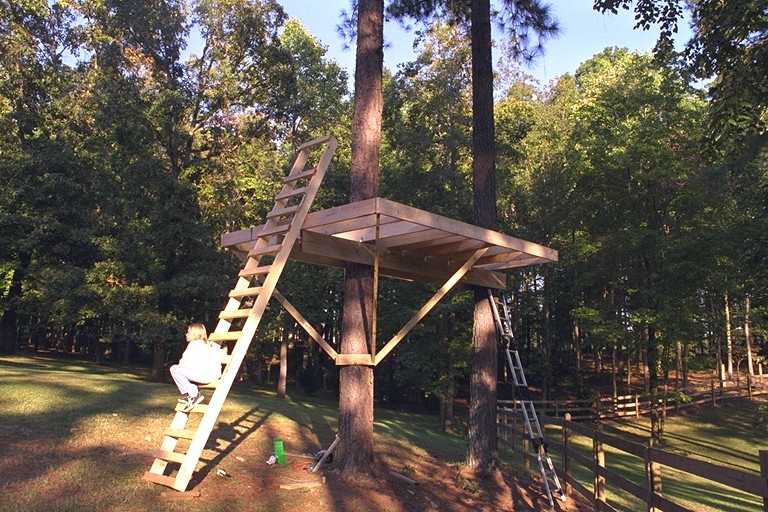
The trees are 18 inches in diameter and are Southern Pine, spaced approximately 9 feet apart. The foundation consists of 2 2x12x16' treated dimension lumber, one on each side of the two trees approximately 10 feet off the ground. In order to mount the foundation 2x12s, the first thing I did was to build a long ladder from 2x6x16' rails and 2x4 treads. This gave me an extra ladder to work with. The foundation boards were bolted to the trees using 5/8" galvanized lag screws at least 8" in length. I wanted to use 3/4" screws, but couldn't find them. 2 lags per side in vertical configuration. A notched oval hole was used in one end of the 2x12 so the trees can sway slightly in the wind. You can see the 1st 2x12 and the ladder in the following picture:
 All pictures are between 90K-140K bytes at 700x500 resolution.
After the 2x12's were mounted, the floor joists were placed perpendicular to the supports. They were tied to the 2x12 with hurricane ties and the headers were placed at the ends of the floor joists. The floor joists were 24" on center. First mistake. Make 'em 16" on center. The little bit of money I saved wasn't worth it. The next picture shows the joists and the left header already in place.
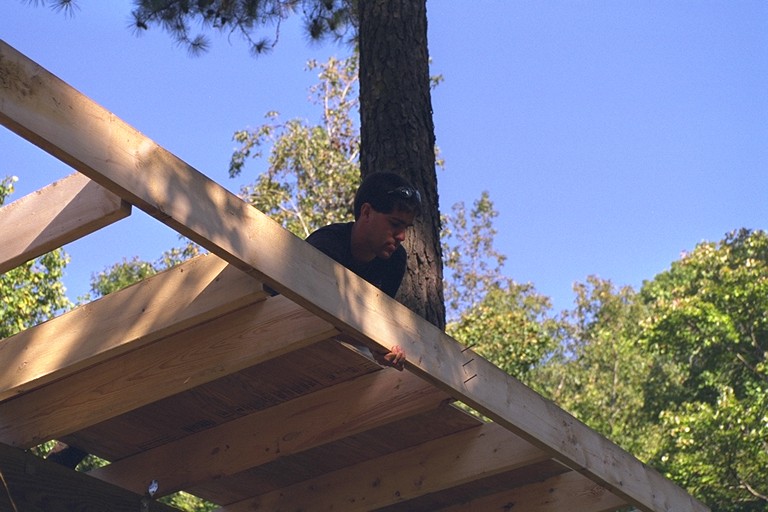
This picture is my neighbor, Brian, nailing the left header to the floor joists. He's kneeling on a piece of 4x8 plywood to distribute the weight and provide a stable work area.
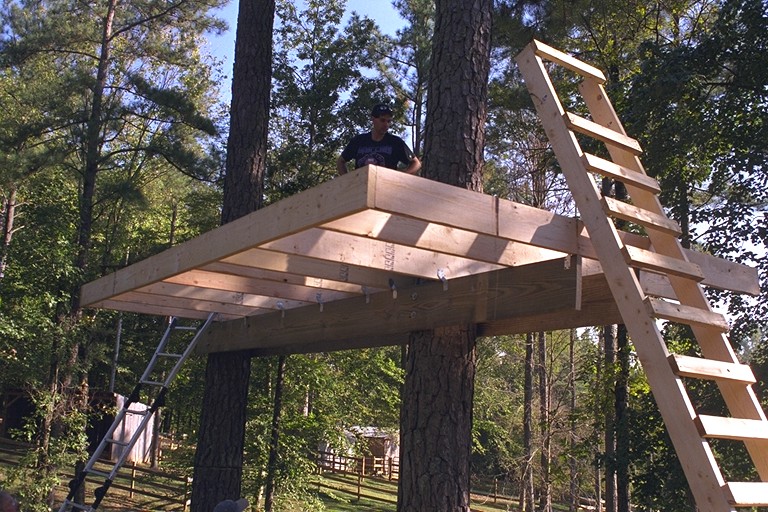
Joists and headers are complete. That's me climbing the ladder.
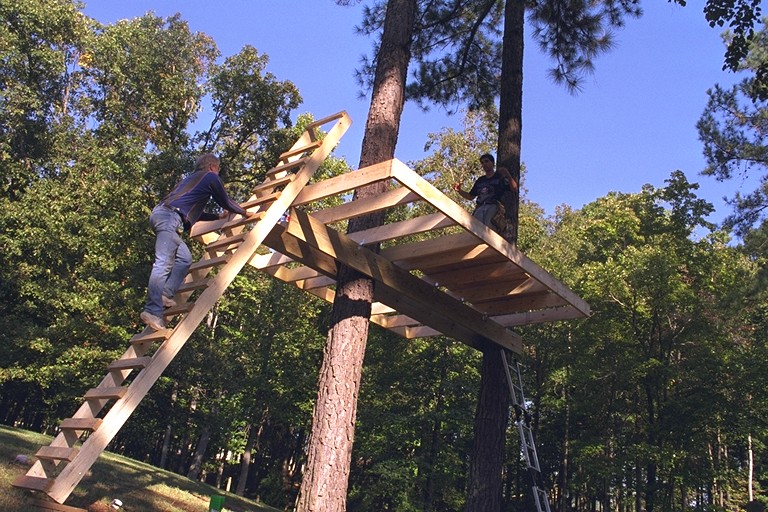
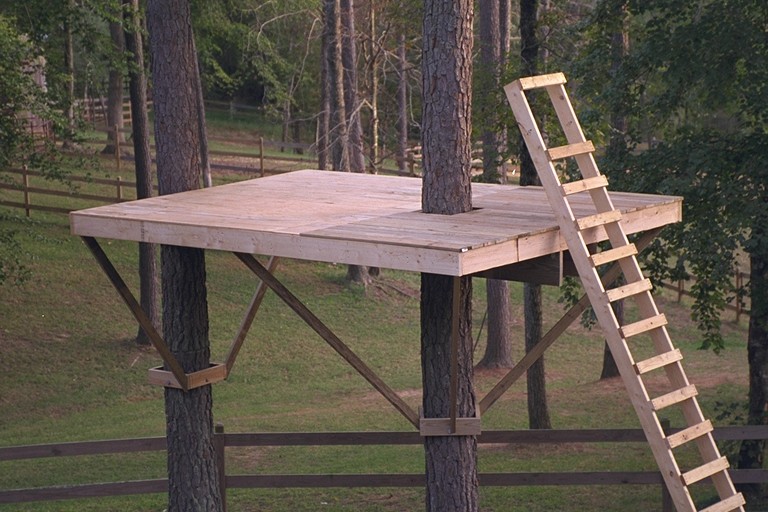
The next thing to do is lay the flooring and support the platform. Balancing the platform on two 2x12 18 inches apart doesn't provide any support for rolling about the longitudinal axis, so we braced the sides using 2x4's nailed to a "box" of 2x6's lag screwed to the tree about 5 feet below the platform. The next picture shows 4 of the six support legs in place.
After providing good side-to-side support, I laid the flooring. In the main part of the house, I used 1/2" CDX plywood subflooring. Second mistake. Don't use 1/2" with 24" on center joists. This should have been at least 5/8" or even 3/4". This thin plywood combined with the wide joists makes for a very mushy floor. The front deck was 5/4" x 6 treated decking boards. The next picture is of the completed flooring and deck. You can also see the rear supports.
Early Oct 1998
All of the walls were framed up in the treehouse. By building a stable platform first, we could use it to build the walls laying down, then raising them into position. The next picture is of the two identical side walls. Each one has a center 3x4 foot window. Bracing was used to prevent it from falling down until the sides were all done.
After doing the two sides, I framed the rear wall (which has no windows). Because of the tree being right behind the wall, I also placed the siding on it while it was laying down, then lifted it into place. The siding is T1-11 5/8" plywood siding with 4" oc groves. I was going to use 8" oc groves, but the lumber yard didn't have enough.
Last was the front wall, which has a 2x4 foot window on the left side and a door on the right side.
Once all four walls were up, the top plates were added to walls. The next trick was to place the siding on the outside wall and nail it into place. 5/8" plywood sheets are reasonably heavy, this was a true 2 person job. Not only that, you're pretty high up! We resorted to nailing a small 2x4 support cleat on the bottom of the floor joists to support most of the weight of the plywood sheet until we could drive a few nails to support the siding. Of course, the front (where the deck was) was much easier. Good reason to provide a deck on all sides. If you can, put on the siding before you raise the walls, like I did with the rear wall. Duh!
Early November 1998
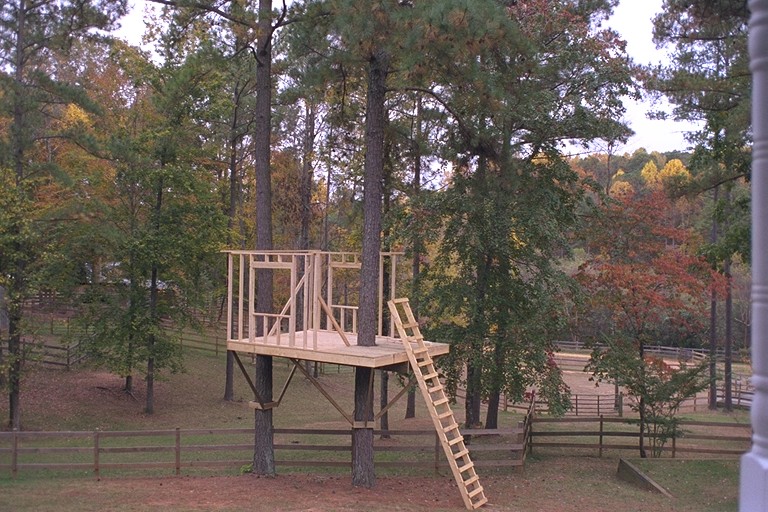
These pictures are with all 4 wall frames intact and partial siding. The fall colors are also close to their peak.
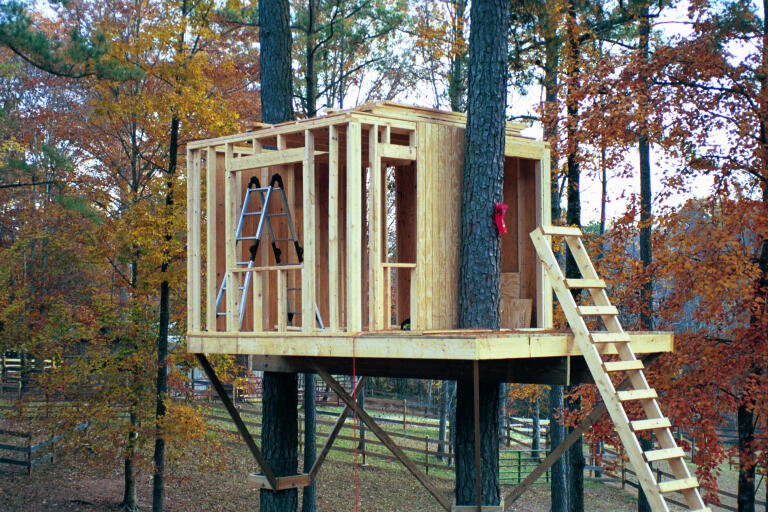
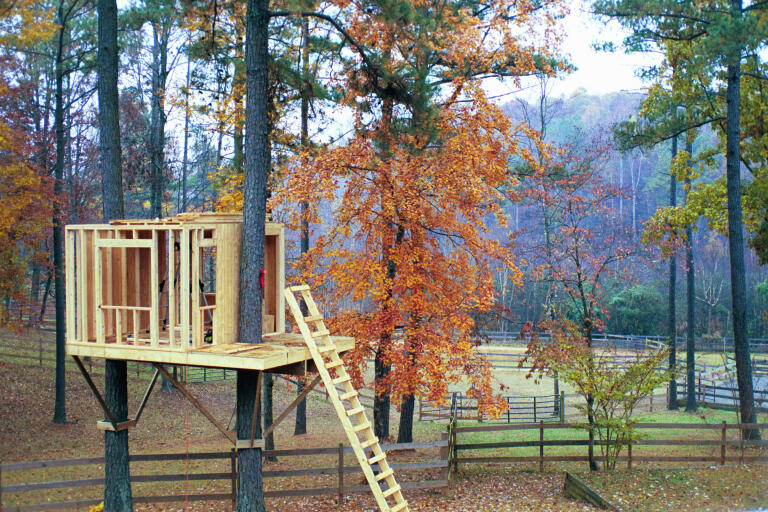
I decided to place an attic floor to provide a small loft. I added the attic floor rafters (2x6, 16" oc) using joist hangers attached to the top plate of the walls. Third mistake: I placed the opening to the attic too close to the side walls, making it a bit difficult to climb up without banging your head on the roof. The attic flooring is 5/8" BC plywood. Much better than the original floor. The next set of pictures shows interior views of the sides, front window, and front door respectively. You can see the attic floor joists and flooring from below.
![]()
![]()
![]()
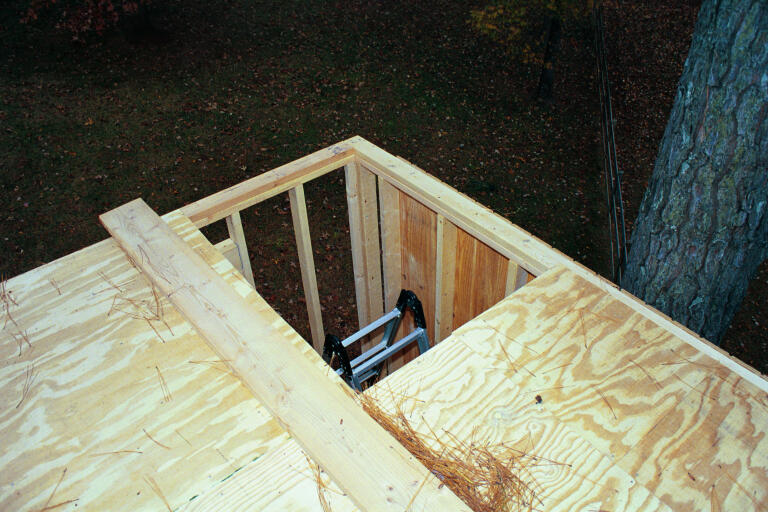
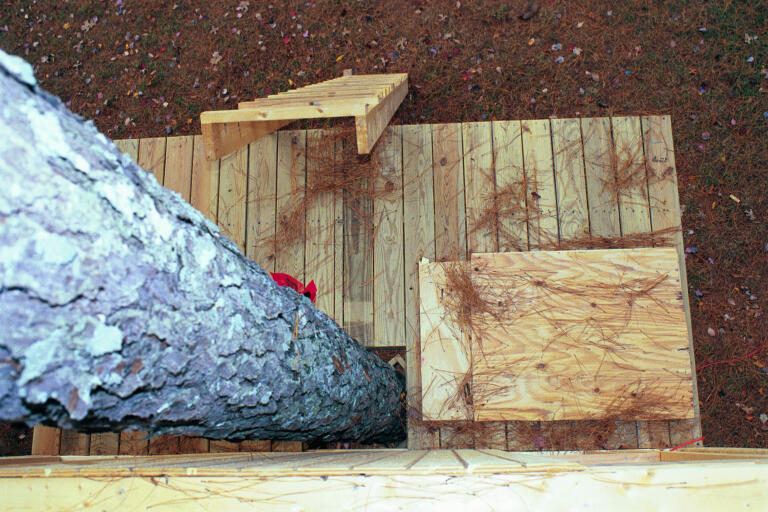
These pictures are from up on the roof/attic floor showing the attic opening, and the front deck from above. The last picture is looking up from on top.
Work on the treehouse slowed down a lot for the winter. Much of the roof was completed in December, and during a warm spell in January. February and March were cold and rainy so almost nothing got done.
The roof consists of 2x6x8 rafters (16" oc) and a 2x8 header at the peak. The pitch is 12-12 which makes all the angles 45 degrees (easy to measure and cut). This was to allow a bit more headroom in the loft. Once the rafters were in place, vertical end supports were added to support the roof and to have something to nail the siding to. Roof sheeting was done with 1/2" plywood sheets. I obtained more T1-11 for the sides of the roof peak and pre-stained them (red cedar, semi-transparent) before I cut and nailed them.
Shingles have been bought, and are waiting for the right day. Still need to stain the three sides. I haven't decided what I'm going to do for windows at this point, but the door will be made from the T1-11 siding with 1x4 clear pine trim in a Dutch door configuration (top and bottom separate). The deck railing can be completed when I have finished the trim on the front outside edges.
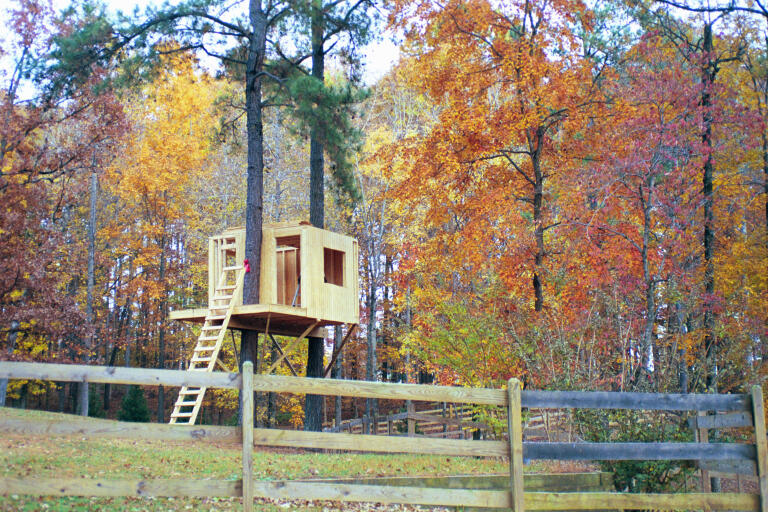
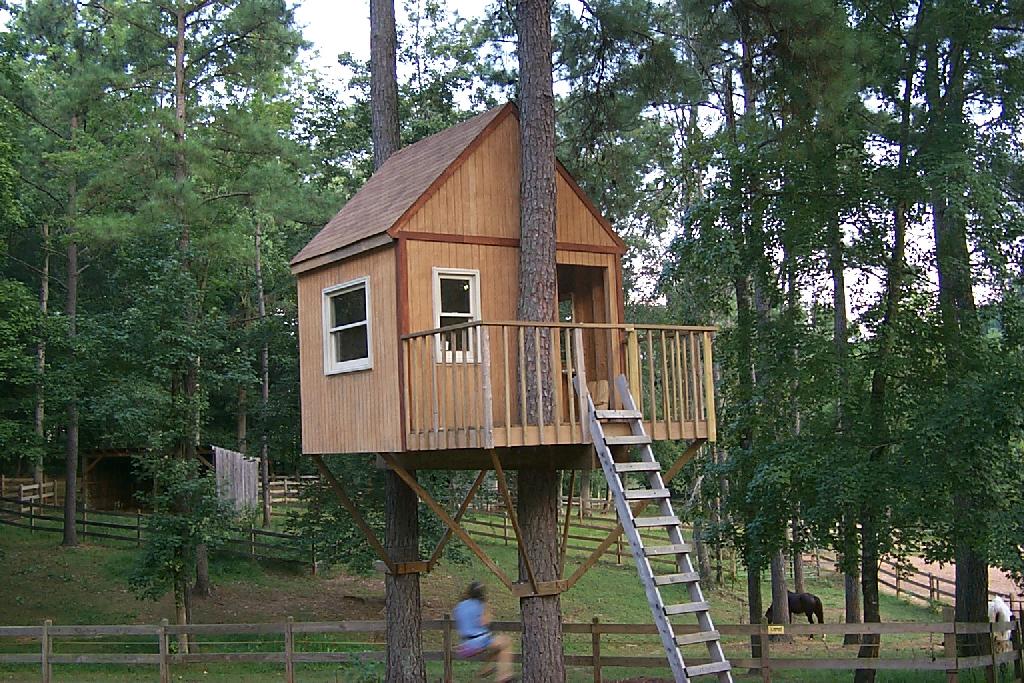
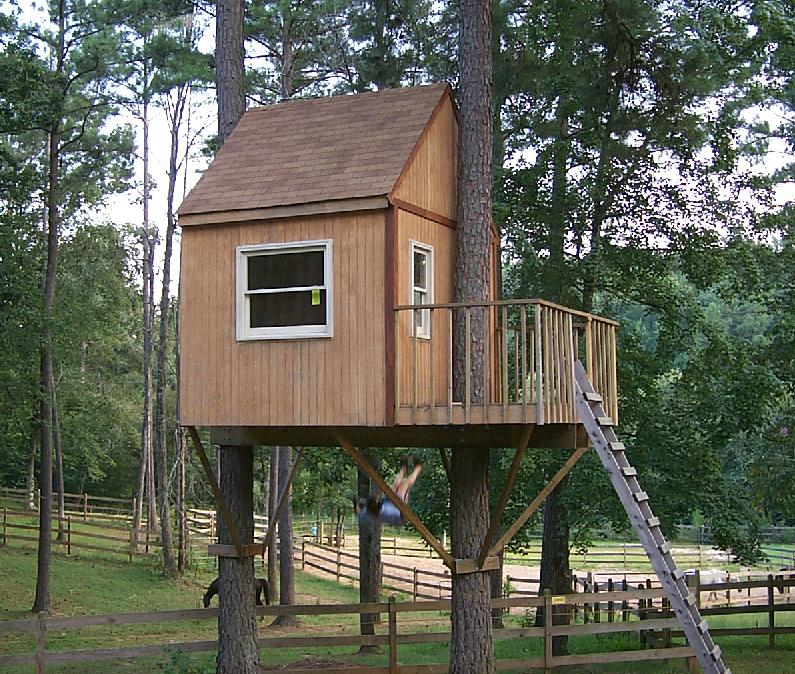
Summer 2001
Ok, ok. So its been a really long time. Bad news is the treehouse still isn't
finished. Good news is that a lot has been completed. It has a roof, shingles,
deck railing, windows, roof vent (electric), most of the electrical wire holes
have been drilled, and some trim is on the outside. Major tasks to complete
are door, finish the electrical, finish the trim, inside wall paneling. Then
we'll be done. I'll add more construction details someday.
Ready for the picture?
Look here and here.